Sunday, March 22, 2009

Variations on a Theme

There is a lot more you can do with the humble tee shirt dress.

Tee shirt dress with a circle skirt:
100_0403.jpg

Tee shirt dress with a tiered skirt:
100_0399.jpg

Tee shirt dress with a tiered skirt and embellished top:
20080805_0885

I've got the pics taken and ready to go to show you how to make these variations. I'll get the instructions up in the next day or so. : )

Tuesday, March 17, 2009

St. Patty's Day Sew and Tell

I thought the bishop dress deserved it's own post. Here are the other things I've finished up lately:

A bad picture of the bug dress. WG had another round of school pictures last week and this is what she chose to wear. I love that my girl loves bugs and worms but will only wear dresses.
bug dress

This skirt is from the most recent issue of Ottobre kids. It is CRAZY full. The bottom ruffle was 308 inches long (7 cuts salvage to salvage) before I gathered it. It was like a big fabric intestine. (We deal with too much GI things in this house, can you tell?) I wasn't sure I'd like it because it reminded me a little bit of a pageant dress. Nothing against pageant dresses, but it's not really WG's style. It's really cute on her, though, and she has now decided that all of her shirts need to have her initials. Of course, I haven't been able to get a pic of her in the outfit...
100_0371.jpg

Here is Tim's coat, all finished! He did a great job. (Like my new countertop? He put that in, too!) This is more WG's style: striped leggings, polka dot socks, and a patchwork skirt. I made the skirt by sewing a charm pack into strips and then together. Easy peasy.
100_0380.jpg

Cheap Therapy

Molly's dress
Back of Molly's dress
Close up of Molly's bishop

This is a special dress for a special girl who is not my daughter. I made this for a friend in Michigan who doesn't know it's coming. Well, maybe she does now. It's my first bishop. I'm a little bit sad to send this dress away because I'm really happy with how it turned out. It makes me want to have a child with a first name starting with M just so they can wear it. At the same time, this dress has been my therapy for the last month and there is something about seeing it finished and sending it on that is quite fitting. 99% of the handwork on this dress was done in doctor's offices. I had just started smocking this dress when I found out I was pregnant. When I started bleeding I took it with me to the ER to work on while I waited. It turned out that my pregnancy was ectopic. Over the next month I had a lot of appointments to deal with that, and this dress came to every one. I find handwork relaxing. My mind wanders as I sew and I often come to solutions to problems while I'm working. In this case I found creating something beautiful for someone else theraputic. I think it's fitting that I've finished up this dress today when we have just been given the green light to try for another baby.

This is also an example of what you can accomplish in 5 minute snippets of time. I sewed the last snap on this morning while waiting for a meeting at the symphony office. Our personnel director saw me and commented that I was always sewing. That is the secret to how I accomplish so (sew?) much.

Monday, March 9, 2009

Simple Tee shirt dress part I

100_0361.<span class=

This is really easy, I promise!

(Yup, that is my husband in the picture. He's working on a coat for our daughter. You gotta love a man who is secure enough in his masculinity to sew. He would want you to know, though, that he also fixes sewing machines and does manly things like run electricity, install flooring, and dispose of any dead squirrels our cat brings us. It's all about balance.)

First, gather your materials. You need a tee shirt, about 1/2 a yard of fabric, and the usual notions: pins, iron, marking pen, tape measure, scissors.

Measure the tee shirt against the intended recipient. Does it end past their waist? You may need to cut it off a bit. Don't get too happy with the scissors, you can always cut more off. Aim for where you'd like the top part to end plus about an inch for the seam allowance. The pink shirt was already cut, I added the green for comparison's sake.
000_0010.jpg

To determine how to cut your fabric, measure your recipient from their shoulder to where you'd like the dress to end. Subtract the length of the tee shirt. Add 3. (The three inches break down into 2 added inches for the hem plus one inch at the top for a seam allowance.) Cut the fabric from salvage to salvage. The salvages are the sides of the fabric that are woven and not frayed. When you bought the fabric, they cut it from salvage to salvage. Try to cut straight because it will really simplify your hemming later. For little girls to age 6 or so, a fabric width of 44 inches (which is salvage to salvage) is enough.

Now we're going to sew! Fold the skirt piece in half, right sides of the fabric together so that you are looking at the back of the fabric (not the patterned part). Match up the salvages. Sew it together using at least a 1/2 inch seam allowance, but also make sure that it's wide enough to have the entire salvage to the right of the needle. Unfortunately my camera pooped out so I don't have a picture of this step.

When you sew a seam, sew forward about an inch, then sew backward, and then sew forward to the end of the seam. At the end, sew backward about an inch, then forward to the end of the fabric. This secures the seam.

Press the seam open.
Press the seam open

Good job! You're done with part I! Next up is gathering...

Tee shirt Dress Part II

Now we're going to gather. First thing to do is to set the upper tension and stitch length. Usually upper tension is set to around 5 and the stitch length is 2.5. We're going to gather with a tension of 7 or 8 and a stitch length of 5. Check your manual if you are not sure where your tension and stitch length dials are.
100_0333.jpg
100_0332.jpg

Fold the skirt tube in half with the seam on one side. Place a pin in the other side to mark where the half-way points of the tube are. Gather the fabric: Pull out a good 6 to 8 inch "tail" of both the needle and bobbin thread. Start where the seam is and line up the side of the presser foot with the edge of the fabric. Sew, allowing the fabric to gather itself as you go. STOP when you get to your halfway point, take the skirt off the machine making big thread tails. Then put the skirt back ON the machine and gather the rest of the way around.
Thread tails:
000_0011.jpg
Presser foot placement:
Presser foot placement for gathering
100_0334.jpg

Once you make it all the way around (don't forget to pull out nice long thread tails at the end!) you're done with part II. Next we will adjust the gathers and attach the skirt to the tee shirt!

Tee shirt Dress Part III

Okay, now we're going to adjust the gathers and sew the skirt to the tee shirt. This is a little bit tricky, but you can do it! Go slow, use as many pins as you need to, and don't feel bad if you need to do some ripping out!

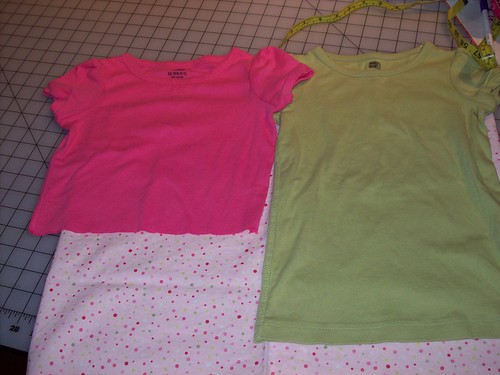
First, lay your skirt on a table or ironing board. It should be inside out. Lay your tee shirt on top of the skirt. It should be right side out. Try to line up the side seam of the skirt with one of the sides of the shirt.
100_0341.jpg

Now you are going to put the tee shirt INSIDE the skirt. The shoulders of the shirt should be aimed at the non-gathered edge of the skirt.
100_0342.jpg

Pin the two pieces together at the side seam. Place another pin on the opposite side. Now you will need to adjust the gathers to fit the shirt. The skirt was gathered in two steps (in halves), so you can adjust the top part of the skirt to fit the top part of the shirt and then do the same with the bottom.

If your shirt is bigger than your skirt, GENTLY pull on the skirt gathers to smooth them out. This is why you left the enormous thread tails.

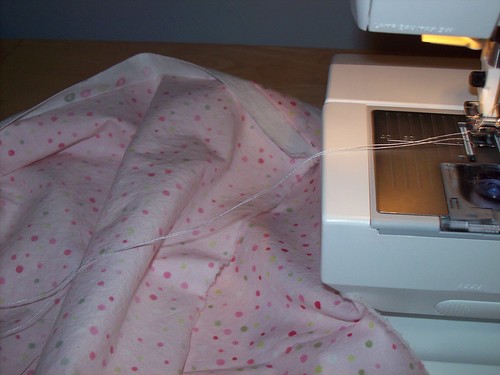
If your skirt is bigger than your shirt, find your thread tails, separate the two threads in the tail and GENTLY pull on one of them to make some more gathers. If one thread doesn't give, try the other.

Once the skirt opening is roughly the same size as the bottom of the shirt, adjust the gathers to make them even. You don't need to be obsessive about it, but try to make it as even as you can.

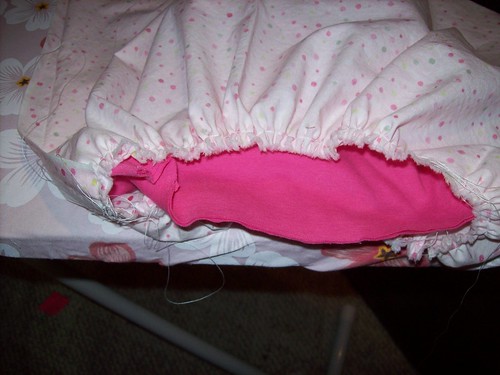
A bad distribution of gathers. See how there is a big straight part and a bunched part. That's bad.
100_0344.jpg

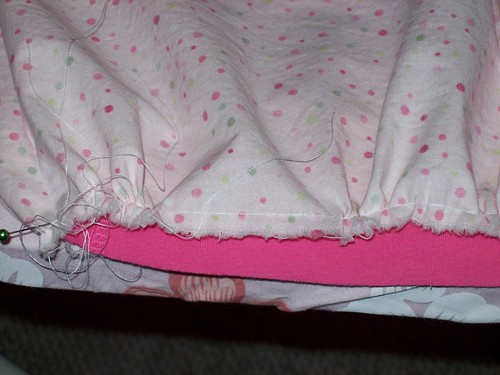
A better distribution of gathers:
100_0345.jpg

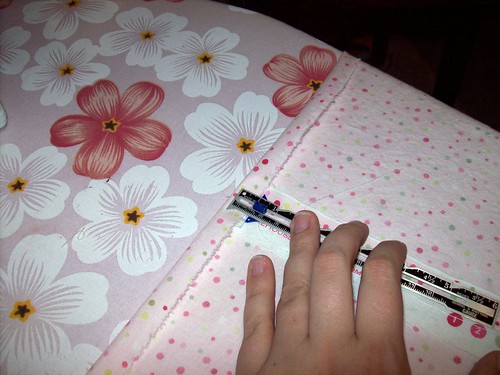
Put as many pins in as you need to feel comfortable! You can always adjust things as you go, too. I like to live dangerously, so I use minimal pins.

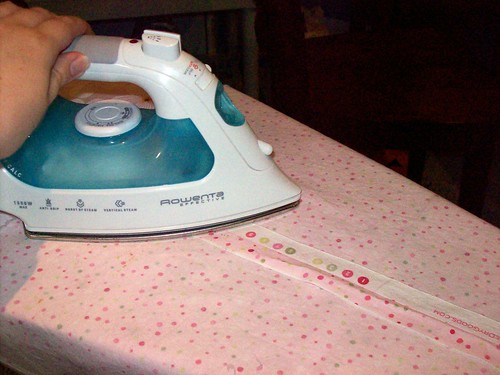
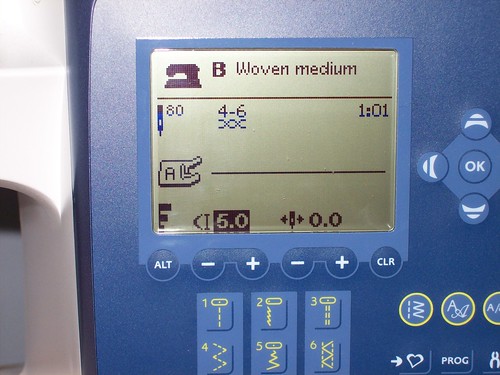
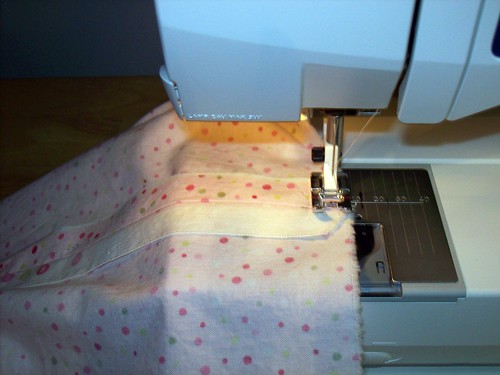
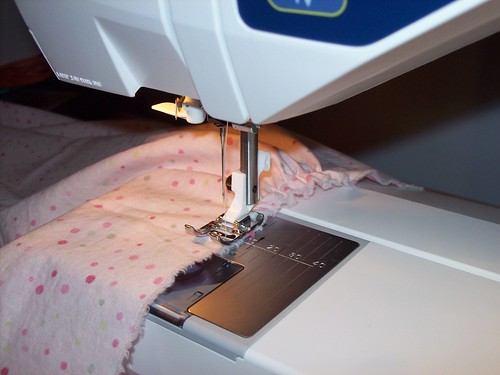
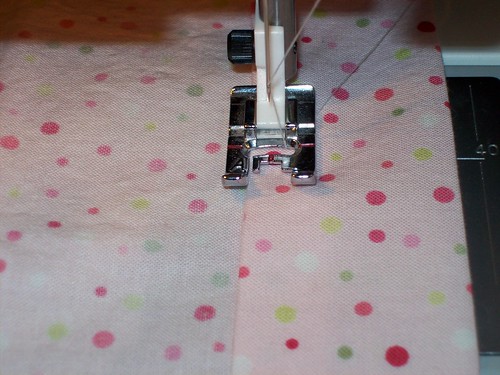
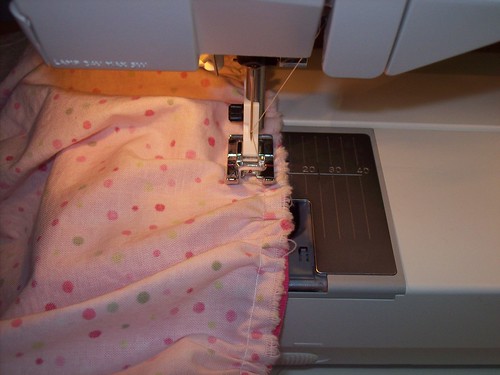
Now you are going to sew the skirt to the top. (Hooray!!!) Look at your tension and stitch length. Make sure they are not still set for gathering! Set your machine to sew a stretch stitch. Look in your manual to see how to do this. We will NOT switch to a stretch needle.

Sew around the edge of the skirt. Try to keep the gathering stitch on the skirt to the right of the needle. Adjust as you go and don't get too discouraged. Things that look like mistakes on the wrong side often are invisible on the right side. Go slow, try your best to keep the same seam allowance all the way around, and don't forget to secure the seam by sewing in reverse at the beginning and end.
100_0348.jpg

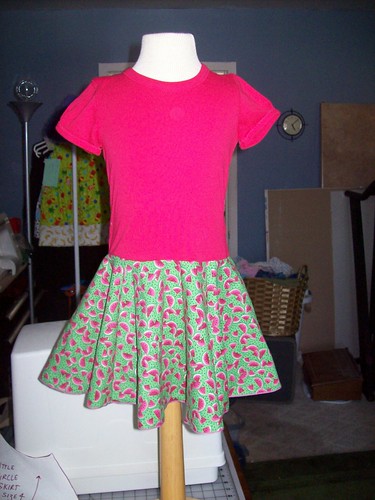
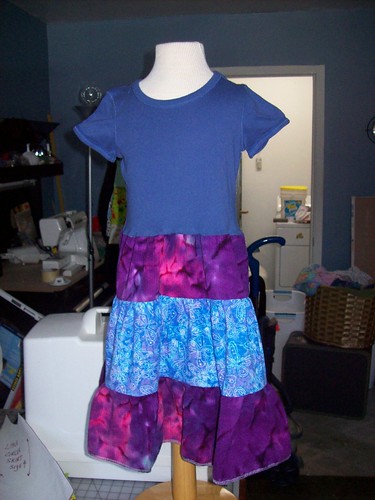
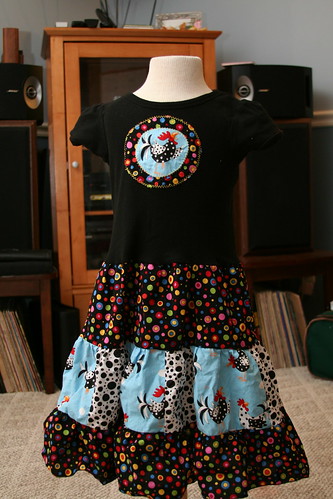
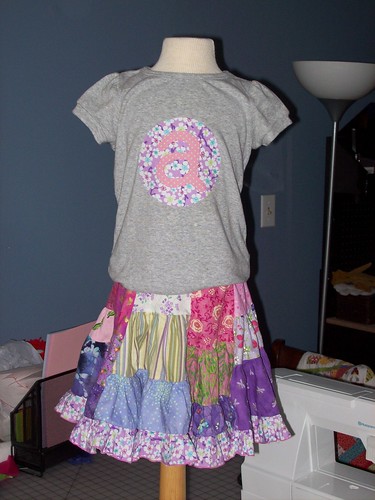
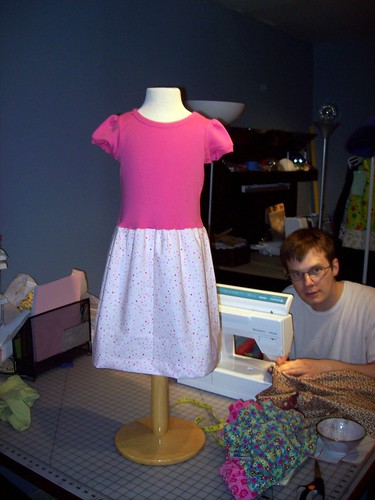
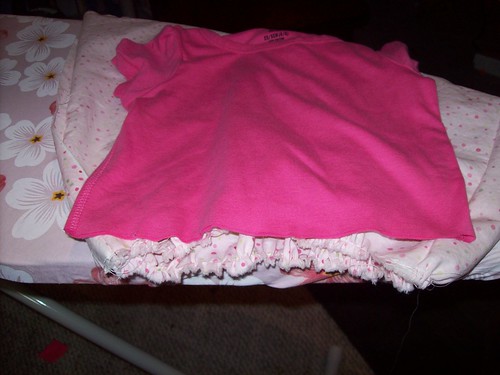
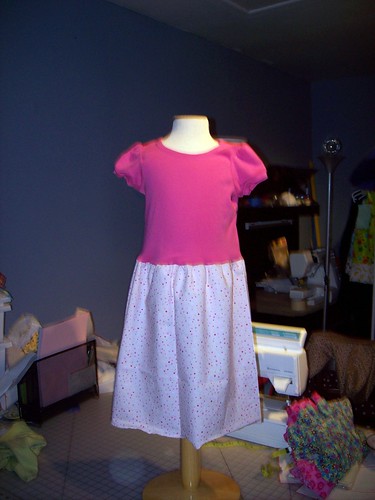
Turn it all right side out and here is what you have:
tee shirt dress unhemmed

Next up we will finish the dress with a hem!

Tee shirt Dress Part IV

Time to finish things up with a hem! There are many ways to hem a dress. This is the easiest way. It's not an ugly way to finish a dress, but it's not as refined as other hemming techniques. If you know how to hem by hand or do a blind hem by machine, go for it! We'll get to that in a few projects.

Turn the dress inside out. Heat your iron up. Turn the bottom of the dress up 1/2 an inch. The little ruler in the photos is one of my favorite sewing tools. It has a little slide that makes it incredibly easy to accurately mark measurements. I know it looks like I turned things up more than 1/2 inch in the picture. I fixed it.

Work your way around the dress, turning up 1/2 inch and pressing well as you go.

Tee shirt dress hem

Now turn the bottom up 1-1/2 inches and press all the way around. Notice how the raw edge of the fabric is still turned under from step one...

Tee shirt dress hem

Secure the hem with pins if you want. No shame in using as many pins as it takes to make you comfortable. Make sure your machine is set for a straight stitch with a tension of 4 or 5 and a stitch length of 2.5. You want the needle to be close to the edge of the turned up hem. If you can move your needle to the left, you can experiment with that. I have a little notch in my presser foot that I lined up with the edge of the hem.

hemming

Sew all the way around remembering to secure the seam by sewing backward at the beginning and end. Try your best to keep the same distance from the edge of the hem.

Clip your threads (I always forget this!), turn the dress right side out, and you're DONE!!!!!

tee shirt dress finished!